Performance Tuning Oakley

I've nearly completed the second Oakley demo and by and large it runs very well in CSpect. However there are a few minor display issues at the top of the screen which is due to the code for each frame taking slightly longer than a frame to run, meaning the top of the frame is actually the previous frame...
The ZX Spectrum display is rendered horizontally from top to bottom, line by line. In total there are 312 of these horizontal lines, often called scanlines. The numbering is slightly odd, in that the top of the screen is not 0. Instead 0 is the first of the Spectrum's display rows, immediately below the top border. As the Spectrum display is 256 x 192 (inside the border) then the scanline immediately after the display at the start of the bottom border is 192. The bottom of the screen is then line 247. Scanlines 248 -> 256 are not on the display at all; they were needed for synchronization on old display devices. Lastly the top border covers scanlines 256 -> 312.
The ZX Spectrum Next makes it very easy to wait for the display to be in the right place before executing some code as it has two hardware registers, Raster Line MSB and Raster Line LSB, which can be used to determine the line currently being rendered by the display. There is a method in the Oakley Display type that uses these to wait until the display reaches the bottom border:
public static void WaitForBottomBorderScanLine()
{
    // Wait for the MSB to become zero.
    while (Hardware.GetRegister(Register.RasterLineMsb) != 0b)
    {
    }

    // Wait for the LSB to hit 192.
    while (Hardware.GetRegister(Register.RasterLineLsb) < 192b)
    {
    }
}
There is one complication on the Next however. The Next allows you to change the clock speed of the processor by using a hardware register. However... The full 14 MHz clock speed cannot be used whilst a Layer2 screen is being rendered - a maximum of 7 MHz is allowed. I therefore suspect that if I ran the demo on a real Next the top of the display would look much worse as I am using 14 MHz to run the code...
In the second demo I've been fairly lazy so far and only started running code once the display was in the bottom border. One obvious optimisation therefore is to run some non-display code, such as updating the positions of objects being displayed, in scanlines 0 -> 192 at 7 MHz and run the rest outside this window. I will do this before the demo is released, but for now I just wanted to see if I could speed up the existing code with a few quick wins.
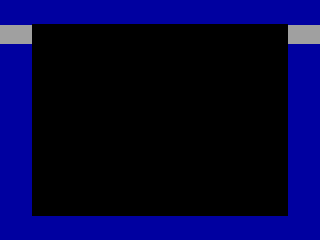
First step in performance optimisation is to measure - how can you know what the slow bits are and if your improvements work without measuring? I intend Oakley to eventually have benchmarking and testing tools included, however they're a long way from being written. Until then one easy way to measure performance is to change the border colour before the code is ran and change it again afterwards. This then shows how many scanlines the code takes to run. Adding in some border colours between the various sections of code in the second demo's loop gives the following:

The real demo is more interesting than this, I've just hidden the display as it's not ready yet! A black border is no code running, and then the various colours are different sections of demo code. As you can see I start running code at the bottom border (blue) and see it is still running by the time it reaches the top of the display again.
After a bit of investigation I realised the code generated by the compiler for for...in loops could be improved. I reduced the demo down to just an empty loop over a 64 element array and started timing from the top border with no turbo enabled. The following Oakley code:
private static Array[Sprite] sprites = Array[Sprite](64b);

private static void MainLoop()
{
   Screen.Cls(0b);
   Hardware.SetTurbo(0b);

   while (true)
   {
      WaitForTopBorderRasterLine();

      Screen.SetBorder(7b);

      for (Sprite sprite in sprites)
      {
      }

      Screen.SetBorder(1b);
   }
}
Gave me this timing:

80 scanlines for an empty loop, not ideal! The Z88DK C code that the Oakley compiler generates for the above is:
void Second_Demo_MainLoop()
{
    struct System_Spectrum_Next_Sprite* sprite;
    struct System_Array_System_Spectrum_Next_Sprite* _items0;
    zx_cls(0);
    ZXN_WRITE_REG(7, 0);
    while (1)
    {
        System_Spectrum_Next_Display_WaitForTopBorderScanLine();
        zx_border(7);
        _items0 = Second_Demo_sprites;
        for (sprite = _items0->Items; sprite < &_items0->Items[_items0->Length]; sprite++)
        {
        }
        zx_border(1);
    }
}
One thing you can see from this is that Oakley arrays are compiled into a C struct which has two fields, Items and Length. The for...in loop is then being mapped to a C for loop. We have a pointer corresponding to the item which we increase each iteration until we reach the end of the array. As Oakley arrays will not change size there is one immediate improvement we can make - do not calculate the pointer for the end of the array each iteration and just calculate it once at the start. That then gives the following loop code: (non-loop code omitted for clarity)
struct System_Spectrum_Next_Sprite* sprite;
struct System_Array_System_Spectrum_Next_Sprite* _items0;
struct System_Spectrum_Next_Sprite* _last0;

_items0 = Second_Demo_sprites;
_last0 = &_items0->Items[_items0->Length];
for (sprite = _items0->Items; sprite < _last0; sprite++)
{
}
This has much better timing, 19 scanlines:
Caching the last pointer helped, but do we even need the last pointer at all? We know the length of the array so we could just count from 0 to Length-1 as we would normally do in a for loop. Even better - count backwards from Length to 1. This has the same number of iterations but our loop termination condition becomes not equal to 0, and processors usually have an instruction to do exactly that. (The Z80 has the JP NZ instruction, JumP if Not Zero) Our generated C code then becomes:
struct System_Array_System_Spectrum_Next_Sprite* _items0;
struct System_Spectrum_Next_Sprite* sprite;
uint16_t _counter0;

_items0 = Second_Demo_sprites;
for (sprite = _items0->Items, _counter0 = _items0->Length; _counter0 != 0; sprite++, _counter0--)
{
}
Which gets us down to 10 scanlines:

8 times faster than the original code, not too bad. Plugging this back into the demo and things look a lot better:
Along with a few other optimisations and running code whilst the display is being rendered there will be more than enough CPU cycles for the second Oakley demo. Which will hopefully be available soon...